VPS (Virtual Private Server) の Ubuntu 上に Nginx + JupyterLab でデータ分析環境 (Python, R) を構築した時のメモです。個人用途のため JupyterLab を選択しましたが, マルチユーザの環境が必要な場合は JupyterHub があります。
環境は以下です。
- Ubuntu 16.04.2 LTS
- JupyterLab 0.34.12
- Python 3.5.5
- R 3.5.3
JupyterLab
Anaconda で Python 3.5 の仮想環境を作成し切り替える。
$ conda create -n py35 python=3.5 anaconda
$ source activate py35
公式の Installation を参考にして, JupyterLab をインストールする。 conda 以外にも pip や pipenv でインストールできる。
$ conda install -c conda-forge jupyterlab
設定ファイルを生成する。
$ jupyter lab --generate-config
認証用のパスワードの hash 値を生成する。以下の例では平文パスワードを “your-password” としている。
$ python -c 'from notebook.auth import passwd;print(passwd("your-password"))'
sha1:ca57d01c5b75:c0c1ebc9c1d1b0e964e03509120830dc138b69aa
パスワードの hash 値を設定ファイルに追加する。また, 起動時にブラウザを開かないようにする。
$ vim ~/.jupyter/jupyter_notebook_config.py
...
c.NotebookApp.password = 'sha1:ca57d01c5b75:c0c1ebc9c1d1b0e964e03509120830dc138b69aa'
c.NotebookApp.open_browser = False
...
c.NotebookApp.port = 8888
R
JupyterLab で R も使いたいので R と R kernel をインストールする。
まず, apt のパッケージのリストに R 3.5 のソースを追加する。
$ echo "deb https://cran.rstudio.com/bin/linux/ubuntu $(lsb_release -cs)-cran35/" | sudo tee -a /etc/apt/sources.list
$ tail /etc/apt/sources.list

## 'partner' repository.
## This software is not part of Ubuntu, but is offered by Canonical and the
## respective vendors as a service to Ubuntu users.
# deb http://archive.canonical.com/ubuntu trusty partner
# deb-src http://archive.canonical.com/ubuntu trusty partner

## Uncomment the following two lines to add software from Ubuntu's
## 'extras' repository.

deb https://cran.rstudio.com/bin/linux/ubuntu xenial-cran35/
R をインストールする。
$ sudo apt-key adv --keyserver keyserver.ubuntu.com --recv-keys E298A3A825C0D65DFD57CBB651716619E084DAB9
$ sudo apt update
$ sudo apt install r-base
IRkernel/IRkernel を使って R kernel をインストールする。 以下では devtools を使っているが, CRAN も利用可能のようである。
$ R

R version 3.5.3 (2019-03-11) -- "Great Truth"
Copyright (C) 2019 The R Foundation for Statistical Computing
Platform: x86_64-pc-linux-gnu (64-bit)

R is free software and comes with ABSOLUTELY NO WARRANTY.
You are welcome to redistribute it under certain conditions.
Type 'license()' or 'licence()' for distribution details.

  Natural language support but running in an English locale

R is a collaborative project with many contributors.
Type 'contributors()' for more information and
'citation()' on how to cite R or R packages in publications.

Type 'demo()' for some demos, 'help()' for on-line help, or
'help.start()' for an HTML browser interface to help.
Type 'q()' to quit R.

> install.packages(c('repr', 'IRdisplay', 'crayon', 'pbdZMQ', 'devtools'))
> devtools::install_github('IRkernel/IRkernel')
> IRkernel::installspec()
[InstallKernelSpec] Installed kernelspec ir in /home/ubuntu/.local/share/jupyter/kernels/ir
Nginx
JupyterLab にもサーバ機能はあるが, Nginx をリバースプロキシとして使う。メインの設定ファイル /etc/nginx/nginx.conf に /etc/nginx/conf.d/jupyter-lab.conf を include する設定を追加する。
http {
  ...

  include /etc/nginx/conf.d/jupyter-lab.conf;
}
/etc/nginx/conf.d/jupyter-lab.conf に JupyterLab に接続する設定を書く。同時に SSL/TLS の終端処理も Nginx とするように設定する。
server {
    listen 443 ssl;
    ssl on;
    ssl_certificate /path/to/cert.pem;
    ssl_certificate_key /path/to/privkey.pem;
    server_name localhost;

    #charset koi8-r;
    #access_log /var/log/nginx/host.access.log  main;

    location / {
        proxy_http_version 1.1;
        proxy_set_header Upgrade $http_upgrade;
        proxy_set_header Connection "upgrade";
        proxy_set_header Origin "";
        proxy_pass http://127.0.0.1:8888;
    }
}
JupyterLab を起動し Nginx を再起動する。
$ nohup jupyter lab &
$ sudo service nginx restart
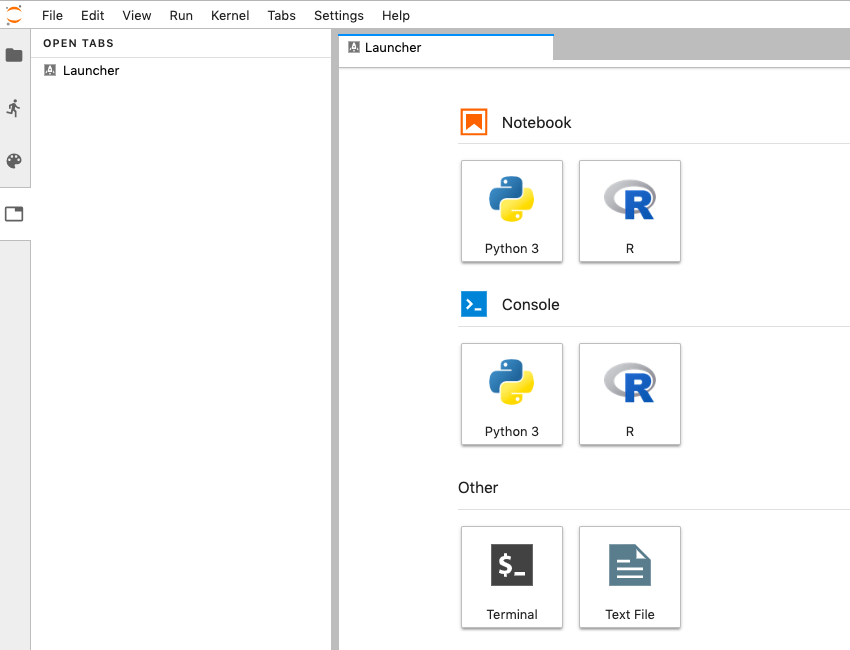
ブラウザから HTTPS で環境構築したリモートホストにアクセスする。認証後, Launcher に R が追加されていることを確認する。
JupyterLab extensions
JupyterLab extensions は JupyterLab の拡張機構である。
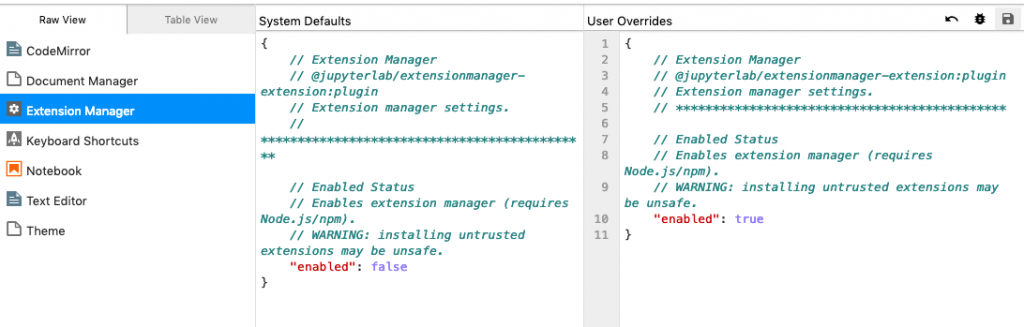
拡張機能をインストールする前に, Extension Manager を有効にする。Settings -> Advanced Settings Editor -> Extension Manager を選択し, User Overrides に {“enabled”: true} と入力する。
また, 拡張機能のインストールに必要となる Node.js をインストールする。
$ conda install -c conda-forge nodejs
jupyterlab-toc
目次 (Table of Contents) を自動生成し左のエリアに表示する jupyterlab-toc をインストールする。
$ jupyter labextension install @jupyterlab/toc
jupyterlab-git
Git ユーティリティの jupyterlab-git をインストールする。
$ jupyter labextension install @jupyterlab/git